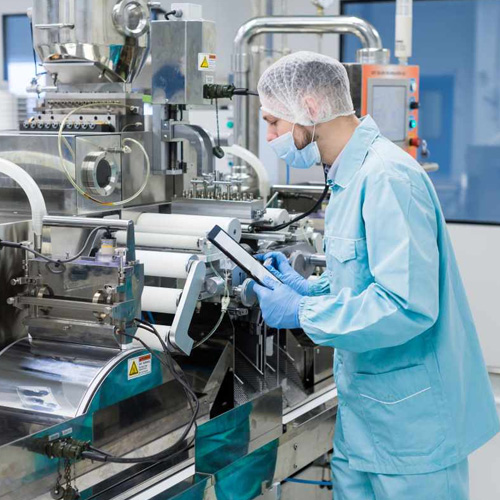

Every pharma factory that runs a liquid filling machine faces the same handful of problems: inconsistent fill volumes, foaming, dripping nozzles, air bubbles, leaking seals, calibration drift, and the occasional PLC error at 2 AM. These problems are not a sign of a bad machine. They are a sign of normal wear, normal product variation, or normal operator learning curves. The good news is that 90% of them can be fixed in 15 to 60 minutes — if you know where to look. This guide shows you exactly where to look, with the same step-by-step process our service engineers use on customer sites across India, Africa, and Southeast Asia.
We have grouped the issues into 12 of the most common liquid filling machine problems in 2026. For each one, you will get the symptom, the root cause, the diagnostic test, and the fix. Use the table of contents to jump to your problem, or read end-to-end to become the most trusted troubleshooter on your floor. By the end, you will save hours of downtime, thousands of rupees in product waste, and the headache of calling the supplier for every small issue.
Table of Contents
- Problem 1: Inconsistent Fill Volume
- Problem 2: Foaming Inside the Bottle
- Problem 3: Dripping Filling Nozzle
- Problem 4: Air Bubbles in Filled Bottle
- Problem 5: Leaking Piston or Seal
- Problem 6: Nozzle Clogging
- Problem 7: Bottle Jams on the Conveyor
- Problem 8: Noisy Machine Operation
- Problem 9: Low Air Pressure Alarm
- Problem 10: Calibration Drift Over Time
- Problem 11: Product Contamination / Cross-Batch Mix-up
- Problem 12: PLC or HMI Errors
- Quick Reference: Problem → Cause → Fix
- Prevention: 7 Habits That Stop 80% of Problems
- Frequently Asked Questions
Problem 1: Inconsistent Fill Volume
This is the #1 problem in any pharma filling line. Bottles come out with weights that vary by more than ±2%, which is unacceptable for most drug products.
Symptoms: Some bottles are 5% under-filled, some are 5% over-filled, the average is correct, but the standard deviation is high.
Root causes (in order of likelihood)
- Worn piston seals (most common). The piston O-ring or lip seal has hardened or torn, allowing liquid to leak past it.
- Low compressed air pressure. The pneumatic cylinder that drives the piston does not have enough force.
- Partially clogged nozzle. Restricts flow, so the cycle ends before the full volume is dispensed.
- Wrong recipe in PLC. Stroke length or pump speed is set incorrectly.
- Air leak in the product line. A loose tri-clamp or cracked pipe is sucking air instead of liquid.
Diagnostic test (10 minutes)
- Check the air pressure gauge on the machine. It must read 6.0 to 7.0 bar. If it is below 5.5 bar, the compressor is the problem.
- Run 5 bottles and weigh each on a calibrated balance. Note the variation.
- Stop the machine. Open the product tank valve and look at the piston cylinder while running manually. If you see liquid seeping past the piston, the seal is bad.
- Remove the nozzle and try to blow through it. If it is hard to blow, it is clogged.
Solutions
Fix for worn seals: Replace the piston seal kit. For a typical pharma piston, the seal kit costs ₹800 to ₹3,000 and takes 15 minutes to change. Always keep 2 spare kits in stock.
Fix for low air pressure: Check the compressor’s pressure switch, drain its moisture trap, and check for air leaks with soapy water on the fittings.
Fix for clogged nozzle: Soak the nozzle in warm water (40°C) for 10 minutes, then clean with a soft brush. Never use metal wire — it scratches the polished surface.
Pro Tip: The fastest diagnostic is to weigh 5 bottles in a row. If the weights are all within ±0.5 g of each other, the machine is fine. If they are scattered, the piston seal is the #1 suspect.
Problem 2: Foaming Inside the Bottle
Foaming is most common with protein solutions, suspensions, and carbonated liquids. The foam rises above the bottle mouth, sticks to the cap seal, and ruins the product.
Symptoms: White foam at the top of filled bottles, foam on the inner cap, inconsistent volume because foam takes up space.
Root causes
- High fill speed. Liquid hits the bottom of the bottle too fast and splashes.
- Top-down fill. The nozzle is above the bottle, so liquid falls and traps air.
- Product too warm. Warm liquid foams more than cold liquid.
- Agitation in the tank. The stirrer is whipping air into the product.
Solutions
Fix 1: Use a bottom-up fill nozzle. This is the single biggest fix. The nozzle goes inside the bottle and fills from the bottom, so the liquid level rises without splashing. Most pharma fillers come with bottom-up nozzles — make sure yours is installed.
Fix 2: Slow down the fill speed. Reduce the piston speed by 20 to 30% during the last 20% of the fill. This is called “slow-fill at the end” and most PLCs let you program it.
Fix 3: Cool the product. Keep the bulk tank at 20 to 25°C. Many syrups foam 50% less at 22°C than at 30°C.
Fix 4: Reduce agitation. If your tank has a stirrer (for suspensions), slow it down or use a slow anchor-type agitator.
Problem 3: Dripping Filling Nozzle
A dripping nozzle wastes product, stains the outside of the bottle, and creates a contamination risk. A good nozzle should not drop a single drop between cycles.
Symptoms: Liquid drops from nozzle between bottles, wet bottles leaving the filling station, sticky conveyor, drips on the floor.
Root causes
- Worn shut-off seal inside the nozzle. The most common cause.
- Clogged nozzle. A small particle keeps the valve from fully closing.
- Weak nozzle spring. The spring that pushes the valve closed has weakened.
- Wrong nozzle for the viscosity. A thin-liquid nozzle drips when used for thick products.
Solutions
Fix 1: Replace the nozzle seal kit. The kit usually has 1 O-ring, 1 lip seal, and 1 spring. Cost: ₹300 to ₹800 per nozzle. Replace every 3 to 6 months as preventive maintenance.
Fix 2: Clean the nozzle. Soak in warm water, brush with a soft brush, blow out with compressed air.
Fix 3: Match the nozzle to the product. Ask your supplier for a “high-viscosity nozzle” if you fill syrups or oils. They have larger ports and stronger springs.
Problem 4: Air Bubbles in Filled Bottle
Air bubbles look ugly, can hide under-filled product, and in sterile injectables are a serious quality defect. They are different from foam — they are single, distinct bubbles stuck in the liquid.
Symptoms: Visible bubbles floating in the liquid after filling, hazy appearance in clear products, micro-bubbles in injectables.
Root causes
- High fill speed. Liquid entrains air as it splashes.
- Worn piston seal. Air leaks past the seal into the product during the back stroke.
- Loose tri-clamp fitting. Air is sucked in through a poorly tightened joint.
- Wrong nozzle design. The nozzle does not vent properly during the back stroke.
Solutions
Fix 1: Replace piston seals. A worn seal is the #1 cause of bubbles. Replace and re-test.
Fix 2: Tighten all tri-clamps. Use the correct torque and replace any gasket that is cracked or swollen.
Fix 3: Add a vacuum de-bubbling station. For injectables, a vacuum chamber after filling removes 99% of bubbles.
Problem 5: Leaking Piston or Seal
Leaks are easy to see but hard to find. They waste product, contaminate the machine, and can lead to microbial growth.
Symptoms: Liquid pooling under the piston cylinder, sticky residue on the machine frame, rust marks on SS parts.
Root causes
- Seals past their service life (usually 6 to 12 months).
- Wrong seal material for the product (e.g., natural rubber in an oil product).
- Scratched piston rod (scored by a metal particle).
Solutions
Fix: Replace seals, check the piston rod for scratches (replace if found), and use FDA-grade EPDM or Viton seals. Always use the seal material recommended by the supplier for your product.
Problem 6: Nozzle Clogging
Clogging is common with suspensions, syrups with sugar crystals, and any product that can dry or settle.
Symptoms: Slow fill, no fill at all, intermittent fills, low pressure at the nozzle.
Root causes
- Seals past their service life (usually 6 to 12 months).
- Wrong seal material for the product (e.g., natural rubber in an oil product).
- Scratched piston rod (scored by a metal particle).
Solutions
Fix 1: Clean the nozzle at every product changeover. Soak in warm water (40°C), brush with a soft nylon brush, and rinse with purified water.
Fix 2: Add a 100-mesh strainer in the product tank. This catches particles before they reach the nozzle.
Fix 3: Use a larger nozzle. If your product has particles larger than 0.5 mm, ask for a 3 mm or 4 mm nozzle instead of a 1.5 mm standard.
Problem 7: Bottle Jams on the Conveyor
Jams stop the line and can break bottles. They are usually caused by mis-sized format parts or wrong bottle geometry.
Root causes
- Bottles outside the spec (too tall, too round, off-center neck).
- Worn star wheels or guide rails.
- Conveyor speed mismatch between stations.
Solutions
Fix 1: Set up a bottle QA station. Check 5 bottles from every batch. Reject any that are out of spec.
Fix 2: Adjust the guide rails. Loosen the bolts, set the rail width to bottle diameter + 1 mm, and re-tighten.
Fix 3: Replace worn star wheels. Worn plastic star wheels lose grip and let bottles tip over.
Problem 8: Noisy Machine Operation
A noisy machine is a sign of mechanical wear. Catch it early and you avoid a major breakdown.
Common Noises and Their Meanings
| Noise | Likely Cause | Action |
|---|---|---|
| Grinding | Worn bearing | Replace the bearing within one week |
| Clicking | Loose cam or set screw | Tighten immediately |
| Squealing | Dry chain or gear | Lubricate with food-grade grease |
| Hissing | Air leak | Locate the leak using soapy water and repair the fitting |
| Rattling | Loose panel or guard | Tighten the panel screws |
Problem 9: Low Air Pressure Alarm
The machine stops when compressed air drops below the set threshold. This is a safety feature, not a problem with the filler itself.
Root causes
- Compressor too small for the line.
- Air leak in the factory pipework.
- Moisture in the air filter (causes pressure drop).
- Multiple machines sharing one compressor.
Solutions
Fix 1: Right-size the compressor. A 4-head monobloc needs a 5 HP compressor with a 200 L tank.
Fix 2: Drain the air filter daily. Water in the filter is the #1 cause of low pressure.
Fix 3: Add a second air receiver tank. This smooths out pressure spikes.
Problem 10: Calibration Drift Over Time
A machine that was perfect in the morning is under-filling by afternoon. This is almost always thermal or mechanical.
Root causes
- Product viscosity changes with temperature (warm = thin, cold = thick).
- Seal wear over the shift.
- Hopper level low (suction side gets air).
Solutions
Fix 1: Calibrate every 2 hours, not once a day. A 30-second check saves hours of rework.
Fix 2: Add a jacketed hopper. This keeps the product at a constant temperature.
Fix 3: Refill the hopper at 30% level, not 5%. Air in the suction side is the main cause of mid-shift drift.
Problem 11: Product Contamination / Cross-Batch Mix-up
This is the most serious problem because it can lead to a recall.
Root causes
- Incomplete cleaning between batches.
- Wrong recipe loaded by operator.
- Shared transfer lines for two products.
Solutions
Fix 1: Use recipe access control. Only the supervisor password can change recipes. Operators can only run the loaded recipe.
Fix 2: Follow the cleaning SOP every time. No shortcuts, even when the line is behind schedule.
Fix 3: Run a placebo batch after every product changeover. Test the placebo visually and analytically before starting the real batch.
Problem 12: PLC or HMI Errors
Errors like “E-Stop Activated”, “Servo Fault”, or “Communication Lost” usually stop the line until cleared.
Common Causes and Quick Fixes
| Error | Cause | Quick Fix |
|---|---|---|
| E-Stop Active | Emergency stop button pressed | Twist to release and reset on the HMI |
| Servo Fault | Servo overloaded or lost position | Reset the servo, home the axis and restart |
| Low Air | Pressure below 5.5 bar | Check the compressor and reset the machine |
| Door Open | Safety interlock open | Close all guards and reset the machine |
| Communication Lost | Loose Ethernet cable | Reconnect the cable and restart the HMI |
Rule of thumb: 70% of PLC errors are caused by loose cables, open doors, or low air. Check those first before calling the service engineer.
Quick Reference: Problem → Cause → Fix
| Problem | Most Likely Cause | Fastest Fix |
|---|---|---|
| Inconsistent Fill | Worn piston seal | Replace seal kit (15 minutes) |
| Foaming | Top-down nozzle and high filling speed | Install a bottom-up nozzle and reduce the speed |
| Dripping Nozzle | Worn shut-off seal | Replace the nozzle seal kit |
| Air Bubbles | Worn piston seal | Replace the seal kit |
| Leaking Piston | Seal past its service life | Replace the seals and inspect the piston rod |
| Clogged Nozzle | Dried product or particles | Soak in warm water and clean with a brush |
| Bottle Jams | Worn star wheels | Replace the star wheels |
| Noisy Operation | Worn bearing | Replace the bearing |
| Low Air Alarm | Wet filter or undersized compressor | Drain the filter and check the compressor |
| Calibration Drift | Temperature changes or low hopper level | Recalibrate the machine and refill the hopper |
| Contamination | Poor cleaning SOP | Retrain operators and run a placebo batch |
| PLC Error | Loose cable or open safety guard | Reconnect the cable and close the safety guard |
Prevention: 7 Habits That Stop 80% of Problems
Most filling problems can be avoided with these 7 simple habits. Print this list and put it on the machine.
☑ Calibrate every 2 hours with a calibrated balance. Variation must be under ±1%.
☑ Clean the nozzle at every changeover with warm water and a soft brush. Never metal wire.
☑ Drain the air filter daily at the start of every shift. Water kills seals and pressure.
☑ Replace piston seals every 6 months — even if they look fine. Seals age, not just wear.
☑ Keep the hopper above 30% full at all times. Low level = air in the system = drift.
☑ Log every batch in the record with start/end weights, operator name, and any alarms.
☑ Run a placebo test after every product changeover. 10 minutes that saves a recall.
Frequently Asked Questions
The 12 most common problems are: (1) inconsistent fill volume, (2) foaming, (3) dripping nozzles, (4) air bubbles in the bottle, (5) leaking pistons or seals, (6) nozzle clogging, (7) bottle jams on the conveyor, (8) noisy operation, (9) low air pressure alarms, (10) calibration drift, (11) product contamination, and (12) PLC or HMI errors. Most of these can be fixed in 15 to 60 minutes with the right approach.
Inconsistent fill volumes usually come from worn piston seals, low compressed air pressure, partially clogged nozzles, wrong recipe settings, or air leaks in the product line. First check the air pressure (must be 6 bar), then check the piston seals, then recalibrate using a calibrated balance.
Foaming happens when liquid hits the bottle wall at high speed, when product is too warm, or when the fill nozzle is too far above the bottle. To stop foaming: use a bottom-up fill nozzle that reaches inside the bottle, lower the fill speed, keep product at 20 to 25°C, and add a defoamer if the formulation allows.
Dripping is almost always caused by a worn shut-off seal inside the nozzle, or a clogged nozzle that keeps the valve from closing fully. Replace the seal kit (usually EPDM or Viton), clean the nozzle with warm water, and check the spring inside. A good nozzle should not drip a single drop between cycles.
You should calibrate at the start of every shift, after every product changeover, and after any maintenance. Use a calibrated balance and weigh 5 bottles in a row. The variation between bottles should be less than ±1%. Document the weights in the batch record.
Air bubbles are usually caused by high fill speed, splashing inside the bottle, a worn piston that allows air to leak past the seal, or a poorly vented nozzle. Fix by reducing speed, replacing piston seals, and using a bottom-up nozzle with proper venting.
Follow the SOP: (1) drain the product tank, (2) flush the lines with warm purified water (40°C), (3) circulate 1% caustic solution for 20 minutes, (4) rinse with purified water, (5) sanitize with 70% IPA or hot water at 80°C, (6) re-assemble and run a placebo test, (7) log the cleaning. CIP cycles automate this for automatic machines.